In this article, I will show you how to create a local WordPress environment. I will also explain the pros and cons of having WordPress installed locally.
Maybe you are thinking about starting a blog or website. Or perhaps you already have a self-hosted website or WordPress.com website. Or you want to learn how to use a Content Management System(CMS). Whatever the case, there are many benefits to having your content stored locally.
Install and Run XAMPP
Before you install WordPress, you will need a web server to host it. XAMPP is a free and easy-to-use program to create a local web server for your computer. The program works on Windows, MacOS, and Linux. You can download and install the latest version of XAMPP here.
After you install XAMPP, open the program on your computer. It should look like the image below (on Windows 10). MacOS will have fewer modules on the Manage Servers tab.
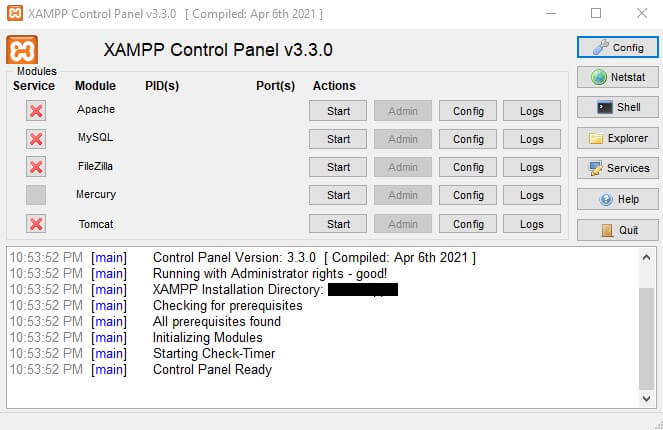
You must start the Apache and MySQL services before accessing your new server. Once they are running, click on the admin button for MySQL. The PHPMyAdmin panel will open in a new browser window. See the image below.
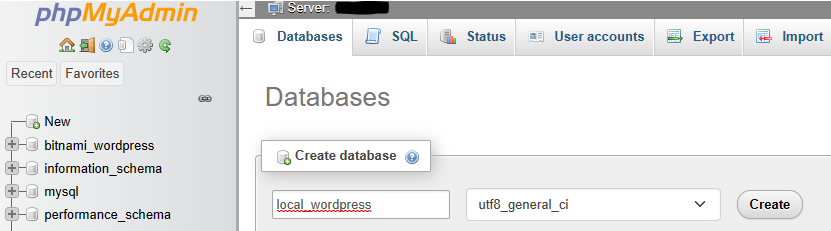
You want to click New under the recent and favorites button. Name your new database whatever you want (local_wordpress in my example). In the dropdown, you can select utf8_general_ci and click Create. Remember the database name because you need it to install WordPress in the steps below.
Installing WordPress
XAMPP used to be paired with Bitnami to install WordPress with the click of a button. Recently, Bitnami has changed its apps page.
I have not found a way to install WordPress in XAMPP using Bitnami as of this writing. Consequently, you need to install WordPress manually to your new XAMPP server. But do not stress because I will help walk you through it.
You will need to download the latest version of WordPress from here. Because the installation is in a zip file, you will want to unzip the contents to the htdocs folder in the XAMPP installation directory.
After extracting the folder, open your browser and enter localhost/wordpress in the URL bar.
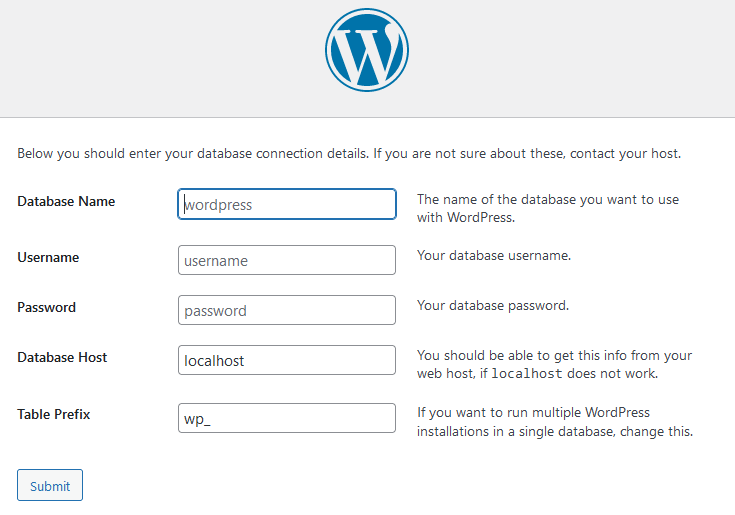
Next, fill in the form using the information from the MySQL admin panel. The database name is the one you created above. Use root for the username and leave the password field blank.
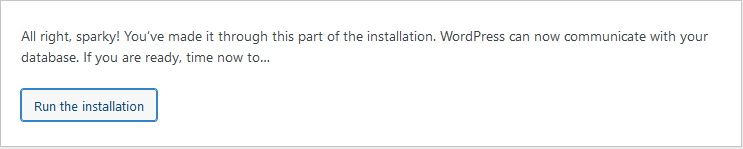
Keep the host as localhost, and if you plan to have a single instance of WordPress installed locally, keep wp_ as is. After clicking on Submit, you should be ready to install WordPress to your XAMPP server.
During the installation of WordPress, you will give your blog a name, which you can change at any time. Furthermore, you will also create a username and password for your local environment for WordPress. As with all accounts, do not forget your username and password.
Finally, you can log in to your new local WordPress environment by entering localhost/wordpress/wp-admin in the URL bar. Use the credentials that you created during the installation. You could also view the site without logging in by entering localhost/wordpress/.
Local WordPress: Pros
Let us look at the pros of creating a local WordPress site.
Themes
Websites hosted at WordPress.com have limited themes to use on free accounts. More become available when you upgrade to a paid version.
However, your new local site has access to many more themes. Therefore, you get more options on how you would like your website or blog to look. Also, you can install any purchased themes on your local server.
For example, I was looking for a new theme to test out for my website. After reading about the Hueman theme on another blog, I wanted to try it. So I installed it on my local site and explored many settings. Being able to do this has been beneficial.
Plugins
Plugins can help with SEO, forms, security, site speed, and more. WordPress has a variety of plugins available to help you with your website or blog. Wouldn’t it be nice to be able to try them out and get familiar with them? I think so.
The free version on WordPress.com comes with one or two pre-installed plugins. They removed the ability to install new ones unless you pay for an upgrade. Fortunately, you can install any plugin on your local WordPress server.
For example, SEO is a big deal for ranking on search engines, especially Google. The free account on WordPress.com lacks plugins that help with SEO.
You can install and activate AIOSEO or Yoast SEO on your local WordPress site. Be sure not to have both activated because it will cause unwanted conflicts.
I use Yoast SEO on my local WordPress to assist with readability. The plugin highlights the lines of text that can use some improvement.
Development
As a developer, you wouldn’t want to use your live website to experiment with themes or plugins. One wrong line of code could bring your entire website down. And who wants that to happen?
If you ever wonder how people create and sell themes or plugins for WordPress, having a test environment is the answer. You can learn how to create and develop themes from scratch.
Also, if you know little to nothing about coding themes or plugins, it is okay. Perhaps one day, you will want to dive in and become a developer.
Content Backup
Chances are, you will produce content in your new test environment. And you will write, read, edit, publish, and view your content until it looks exactly how you want it. Afterward, you will want to copy everything you created to your self-hosted or WordPress.com site. What remains on your local web server is essentially a backup of your content.
No Internet Required
Lastly, internet access is not required to access your local server. You can still create and edit content, even on the road. Today, internet access is available almost anywhere in the United States. But, in that rare instance where you lack an internet connection, you can still create content on your local test site.
Local WordPress: Cons
Now let us look at the cons of having a local WordPress site.
No Visitors
Only YOU can see your local site; no visitors will find it. And it is not entirely a bad thing. If you were in the middle of developing something, and it went wrong, nobody would see it.
If you did want visitors, I think you might be able to do so by using a static IP address, permission from your ISP(Internet Service Provider), and a purchased domain pointing to the static IP. However, I do not recommend trying to do this.
Transfer of Content
Once you create content you like, you will want to transfer your creations to your live website. It would be an extra step for a blogger to produce content for their live website. Fortunately, WordPress does come with the ability to export posts, pages, and entire sites.
WordPress Reader Unavailable
WordPress.com has a reader that allows other bloggers to find your posts easily. The reader is exclusive to WordPress.com/Jetpack, so posts from your local environment or a self-hosted website will not show up in the reader.
Summary
Having a CMS like WordPress installed locally is beneficial for any website owner. Aside from being inaccessible to visitors, it has all of the perks of a self-hosted website.
In short, use this tool to learn and practice your web development skills. Experiment with new themes before changing your live website.
If you found value in this article, please leave a comment or share it with a friend!